Ther’s something undeniably comforting about the warm, earthy aroma of freshly baked bread wafting thru a cozy kitchen-a simple pleasure that dates back centuries. Peasant bread, with its rustic crust and hearty crumb, embodies this timeless allure. More than just sustenance, it tells a story of tradition, resilience, and the humble art of transforming basic ingredients into a soulful loaf. In this step-by-step guide, we’ll journey into the heart of rustic charm, revealing how you can bring the authentic taste and texture of peasant bread from the oven to your table, no matter your baking experience. Prepare to roll up your sleeves and embrace the beauty of simplicity in every bite.
Rustic Charm: Selecting the Perfect Ingredients for Authentic Peasant Bread
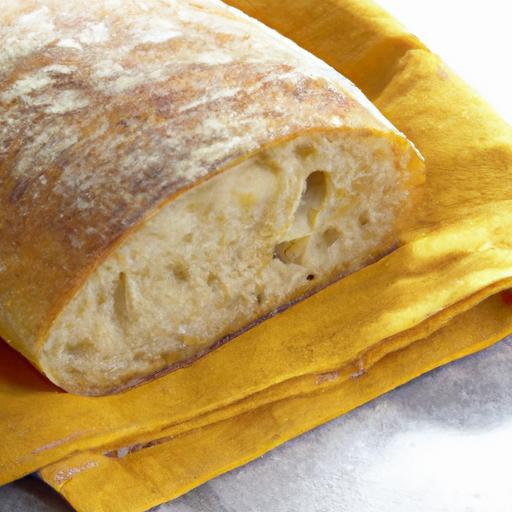
Rustic charm begins the moment you gather the simple,unpretentious ingredients that bring peasant bread to life. This humble loaf, rooted in centuries-old European countryside traditions, embodies warmth, texture, and soul.Crafted from just a handful of pantry staples, it transforms everyday flour and water into a crusty, aromatic masterpiece that comforts the heart and table.
Prep and Cook Time
- preparation: 20 minutes
- Fermentation: 12 to 18 hours (overnight)
- Baking: 40 minutes
- Total Time: Approximately 14 to 19 hours
Yield
Makes one large rustic loaf, suitable for 8-10 servings
Difficulty Level
Medium – Perfect for bakers ready to embrace the rewarding process of traditional kneading and fermentation
Ingredients
- 3 ½ cups all-purpose flour, sifted
- 1 ¼ cups warm water (about 75°F/24°C)
- 2 teaspoons fine sea salt
- 1 teaspoon active dry yeast
- Optional: 2 tablespoons whole wheat flour for extra rustic texture
Instructions
- Activate the yeast: In a small bowl, combine the warm water and active dry yeast. Stir gently and let sit for 5-10 minutes untill it becomes foamy and fragrant, signaling live yeast.
- Mix the dough: In a large mixing bowl, whisk together the sifted flour, optional whole wheat flour, and sea salt. Gradually add your yeast mixture, stirring with a wooden spoon or dough whisk until a shaggy, cohesive dough forms.
- Kneading: Transfer the dough onto a clean, lightly floured surface. Knead with the heels of your hands, folding and pressing for about 8-10 minutes. Aim for a smooth, elastic texture-not sticky, but soft and pliable.
- First rise (fermentation): Place the dough in a lightly oiled bowl, cover with a damp towel or plastic wrap, and leave to ferment at room temperature for 12 to 18 hours. This slow fermentation develops flavor and improves gluten structure – the cornerstone of Rustic Charm in every bite.
- Shaping the loaf: Gently turn the risen dough onto a floured surface. Using your hands, form it into a rustic round boule or oval, folding edges inward to create surface tension. This shaping retains the loaf’s structure while baked.
- Proofing: Transfer the shaped dough onto a parchment-lined baking tray or a floured banneton basket, seam side down. Cover with a clean cloth and let it rest for 1-2 hours until it puffs slightly.
- Scoring: Using a sharp bread lame or a serrated knife, make decisive slashes across the dough’s surface. Thes cuts not only enhance the rustic aesthetic but also control expansion during baking.
- Baking: Preheat your oven to 475°F (245°C). For a crisp crust, place a shallow pan with boiling water on the oven floor to generate steam. Bake the bread for 20 minutes, then reduce the temperature to 425°F (220°C) and bake for an additional 20 minutes until the crust is golden brown and crackly.
- Cooling: Remove the bread from the oven and transfer to a wire rack. Let it cool entirely for at least one hour before slicing to ensure the crumb sets beautifully and avoids gumminess.
Chef’s Notes
- Flour Choice: For an authentic Rustic Charm, use unbleached, high-protein bread flour if available.Adding a touch of whole wheat flour lends earthiness and visual charm.
- Water Temperature: Ensure water is warm but not hot – yeast is sensitive and can be killed by temps above 130°F (54°C).
- Slow Fermentation: Extending fermentation increases flavor complexity. If short on time, use a warm, draft-free spot and reduce to 6-8 hours.
- Scoring Art: Experiment with angles and patterns. Deep,confident cuts improve oven spring and give that signature rustic look.
- Make-ahead Idea: After the first fermentation, wrap the dough tightly and refrigerate overnight. Shape and proof the next day for a convenient baking schedule.
- Troubleshooting: If dough feels overly sticky, sprinkle hands and surfaces lightly with flour, avoiding overuse to prevent a dense loaf.
Serving Suggestions
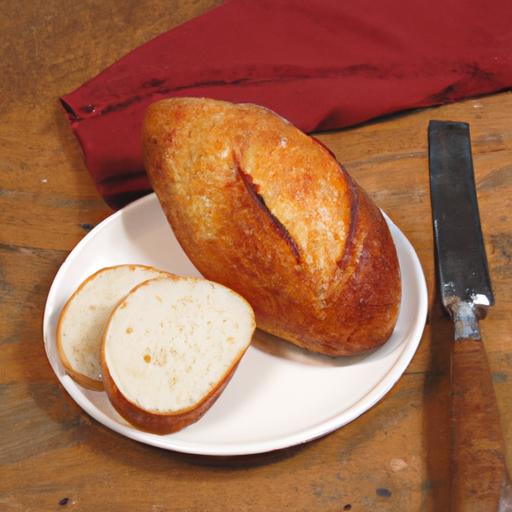
Serve your beautifully baked peasant bread warm, slathered with high-quality extra virgin olive oil, creamy butter, or your favorite herb-infused spread. Garnish with sprigs of fresh rosemary or thyme for visual appeal and aromatic intrigue. This bread pairs magnificently with a bowl of homemade vegetable soup, a sharp aged cheese, or a vibrant tomato bruschetta. Slicing on a wooden board with a serrated knife completes the rustic experience, inviting everyone to savor not just a meal but a story baked into every crumb.

Nutritional Information (per serving)
| Calories | Protein | Carbohydrates | Fat |
|---|---|---|---|
| 180 kcal | 6 g | 36 g | 1 g |
For a deeper understanding of the science behind fermentation and gluten progress, consider visiting the King Arthur Baking guide. For more rustic bread inspiration, explore our Artisan Bread Basics article.
Q&A
Q&A: Rustic Charm – A Step-by-Step Guide to Peasant Bread
Q1: What exactly is peasant bread?
A: Peasant bread is the heart and soul of traditional baking – a humble, hearty loaf crafted from simple, rustic ingredients. It hails from the countryside, where villagers relied on whatever grains were close at hand, resulting in a crusty, chewy bread with a wholesome, earthy flavor.
Q2: Why has peasant bread stood the test of time?
A: Its enduring appeal lies in its simplicity and authenticity. Peasant bread embodies a connection to nature and tradition. Its not fancy, but it’s nourishing, satisfying, and full of comforting rustic charm. Plus, it’s incredibly versatile – perfect toasted, slathered with butter, or as a base for open-faced sandwiches.
Q3: What ingredients do I need to start baking my own peasant bread?
A: You only need a handful of basics: flour (a mix of all-purpose or bread flour with some whole wheat or rye for that earthy flair), water, salt, and a natural leavening agent like sourdough starter or yeast. The magic happens in the slow fermentation that develops deep flavor and texture.
Q4: Can I use any type of flour?
A: While white flour works, combining it with whole wheat or rye gives peasant bread its characteristic rustic texture and subtle nutty notes. don’t be afraid to experiment – the blend you choose will make your loaf uniquely yours.
Q5: What’s the secret to a perfect crust?
A: Patience and steam. Baking your loaf in a hot oven, ideally on a preheated baking stone or cast-iron surface, creates that signature crackling crust. Adding steam during the first 10-15 minutes of baking helps the crust expand before it hardens, resulting in that golden, blistered exterior.
Q6: How long does the process take from start to finish?
A: Expect to invest at least several hours, mostly waiting for the dough to rise. The beauty of peasant bread is in the slow fermentation – sometimes overnight – which develops complex flavors. Active hands-on time is relatively short, but the anticipation is part of the rustic ritual.
Q7: Do I need any special equipment?
A: Not really! A large mixing bowl, a sturdy wooden spoon or dough scraper, a kitchen towel, and an oven will do. A baking stone or Dutch oven enhances the results but isn’t absolutely necessary.
Q8: How can I tell when my bread is done?
A: Your loaf will be golden brown with a firm, hollow sound when tapped on the bottom. The crust should be crisp, and the crumb chewy but airy. Let it cool fully before slicing to let the interior finish setting.
Q9: Any tips for beginners?
A: Embrace the imperfections! Rustic bread isn’t meant to be uniform.Every loaf will have its quirks – that’s part of its charm. Also, keep notes on your flour blends and timing so you can tweak and perfect your recipe with each bake.
Q10: What’s the best way to enjoy peasant bread?
A: Fresh from the oven with a smear of butter is unbeatable. It also shines as a base for stew-soaked slices, a vehicle for sharp cheeses, or a partner to hearty, slow-cooked meals. Peasant bread connects you to tradition, hearth, and home with every bite.
Baking peasant bread is more than a recipe; it’s a journey into rustic elegance, where patience and simplicity craft a loaf that’s as rich in history as it is indeed in flavor. Ready your flour, warm your oven, and let the charm of peasant bread fill your kitchen.
Wrapping Up
Embracing the time-honored tradition of baking peasant bread invites more than just the creation of a humble loaf-it connects you to centuries of rustic charm and simple, soulful nourishment. With each step in this guide, you’ve unlocked the secrets to crafting bread that carries the warmth of a contry hearth and the character of hands well-versed in the art of slow, patient baking. As the crust crackles and the crumb yields with each slice, you’re not just enjoying bread-you’re tasting history, culture, and the heartfelt simplicity that makes peasant bread a timeless treasure in any kitchen. So, roll up your sleeves, embrace the flour-dusted adventure, and let every loaf you bake become a story told in the language of rustic charm.