There’s something magical about the vibrant, tangy kick of a freshly made salsa-the way tomatoes, peppers, onions, and spices come together to create a symphony of flavors that dance on your palate. But what if you could capture that burst of summer sunshine and preserve it, jar by jar, to enjoy year-round? Welcome to the art of canning authentic salsa-a time-honored tradition that locks in freshness, flavor, and the very essence of your garden’s bounty. In this article, we’ll guide you through a tried-and-true recipe that not only honors authenticity but also ensures your salsa remains safe, delicious, and ready to brighten any meal long after the harvest season has passed. Get ready to preserve the flavor and savor every spoonful!
Choosing the Perfect ingredients for Vibrant Salsa Flavor
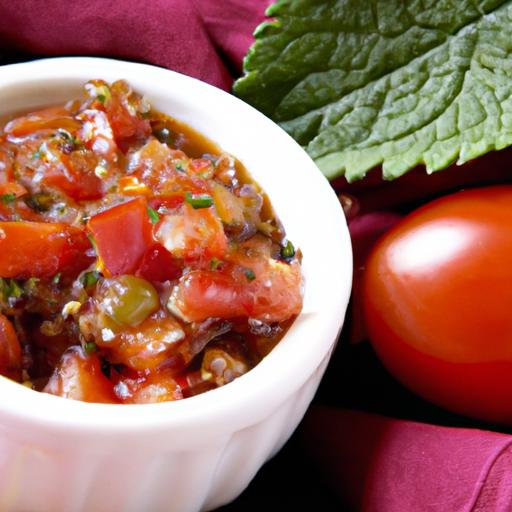
Preserve the flavor begins with selecting fresh, high-quality ingredients that sing together in harmony. A salsa that dazzles the palate relies on the balance of ripe, juicy tomatoes, crisp onions, and fiery peppers – each contributing depth, texture, and vibrant color. Embrace seasonal produce for peak flavor: deep red Roma tomatoes bring richness without excess liquid, while bright green jalapeños offer a lively but controllable heat. fresh cilantro adds brightness and an herbal contrast that enlivens the overall profile.
Look for firm tomatoes free of blemishes, bright white onions with a mild crunch, and peppers that feel heavy for their size, signaling freshness. The lime juice is crucial, not only for a zesty tang but for its natural preservative qualities that enhance acidity and balance the heat.
Mastering the Art of Balancing Acidity and Spice
the heart of any authentic salsa lies in the delicate dance between acidity and spice. Achieving this balance is both an art and a science.Too much acidity can overpower the fresh sweetness of the tomatoes, while excessive heat may mask other layered flavors.
Begin by combining freshly squeezed lime juice and a splash of high-quality distilled vinegar to sharpen brightness and ensure food safety during canning. Gradually introduce spicy elements like minced jalapeños or serranos, tasting frequently to adjust to your preferred heat level. The secret is layering flavors - a pinch of smoked paprika or a dash of cumin complements the heat without overwhelming it, creating a salsa with remarkable depth and complexity.
Step-by-Step Guide to safe and Flavorful Canning
Preserve the flavor by following these tried-and-true canning techniques that lock in freshness while ensuring your salsa stays safe and delicious for months.
- Prepare jar sterilization: Clean all glass jars and lids thoroughly with hot, soapy water. Then sterilize by boiling them in water for 10 minutes or running them through the dishwasher on a high-heat cycle.
- Cook your salsa: Simmer the salsa mixture for at least 10 minutes to meld flavors and reduce excess water. This step helps achieve the perfect chunky consistency.
- Fill jars carefully: Using a ladle and funnel, fill each jar leaving ½ inch headspace to allow for expansion.
- Remove air bubbles: Gently slide a non-metallic spatula along the inside edges to release trapped air bubbles, ensuring a vacuum seal.
- Seal jars tightly: Wipe rims clean with a damp cloth and place lids on top. Screw bands on until fingertip-tight.
- Process jars in a boiling-water bath: Submerge jars 1-2 inches under boiling water; process pints for 15 minutes, quarts for 20, adjusting for altitude.
- Cool and check seals: Remove jars carefully and let cool undisturbed for 12-24 hours. Verify seals by pressing the center of lids-they should not flex up and down.
Following these steps protects your salsa’s vibrant flavor and your family’s safety,making it an easy ritual to repeat season after season.
Tips for Long-Term Storage Without Compromising Taste
Once jarred,storing salsa properly preserves its brightness and fresh taste. Keep sealed jars in a cool, dark place away from sunlight and temperature fluctuations-ideally in a pantry or cellar at 50-70°F (10-21°C).
For best quality, use your canned salsa within one year. once opened, refrigerate and consume within two weeks. Avoid freezing jars with metal lids, as this can compromise the seal and texture.
to maintain incomparable texture, avoid overcooking during the simmer phase and keep chunks intact rather than pureeing.This keeps each bite delightfully fresh and crisp, reflecting the authentic salsa experience you can proudly offer year-round.
Prep and Cook Time
- Prep Time: 25 minutes
- Cook time: 15 minutes
- Processing Time: 15-20 minutes
Yield
Makes approximately 6 pints of salsa
Difficulty level
Medium - perfect for home cooks ready to dive into canning with confidence
Ingredients
- 6 cups ripe Roma tomatoes,chopped
- 1½ cups white onion,finely diced
- 2 jalapeño peppers,seeded and minced (adjust to taste)
- 1 cup fresh cilantro,chopped
- 3 cloves garlic,minced
- ½ cup fresh lime juice (about 4 limes)
- ⅓ cup distilled white vinegar
- 1 tsp sea salt
- 1 tsp ground cumin
- ½ tsp smoked paprika
- ¼ tsp black pepper
Instructions
- Sterilize jars: Clean and sterilize canning jars and lids by boiling for 10 minutes. Keep hot until ready to use.
- Prepare vegetables: Wash and chop tomatoes, dice onions, mince garlic, and seed and chop jalapeños carefully to control heat.
- Mix ingredients: In a large pot over medium heat, combine tomatoes, onions, peppers, garlic, lime juice, vinegar, and seasonings.
- Simmer salsa: Stir and bring mixture to a boil,then reduce heat and simmer uncovered for 10-15 minutes,stirring occasionally to thicken.
- fill jars: Ladle hot salsa into hot sterilized jars, leaving ½ inch headspace. Use spatula to remove air bubbles before sealing.
- Seal jars: Wipe rims clean and apply lids and screw bands finger-tight.
- Process jars: Place jars in boiling water bath for 15 minutes (pints) or 20 minutes (quarts),adjusting for altitude as needed.
- Cool: Remove jars and cool on a towel for 12-24 hours. check seals by pressing center of lids; lids should be firm and concave.
Chef’s Notes
- for milder salsa, remove seeds from peppers or substitute with sweet mini bell peppers.
- Try adding roasted poblano peppers for a smoky twist without extra heat.
- Use fresh, organic produce for the freshest flavor impact and vibrant color.
- Adjust lime juice and vinegar to taste, but do not reduce vinegar below recipe amounts to ensure safe acidity levels.
- For chunkier salsa, pulse ingredients lightly in a food processor instead of chopping finely.
Serving Suggestions
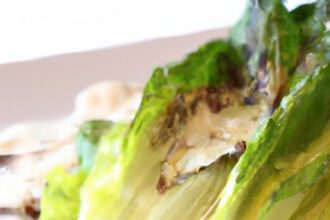
This salsa shines as a fresh condiment atop grilled vegetables, sunny scrambled eggs, or crispy tortilla chips. Garnish with a sprig of cilantro, a lime wedge, or a dash of chili powder for eye-catching presentation. Serve it alongside homemade guacamole and warm corn tortillas for an authentic fiesta spread that delights all senses.

| Nutrient | Per Serving (¼ cup) |
|---|---|
| Calories | 25 |
| Protein | 1g |
| Carbohydrates | 6g |
| Fat | 0g |
For more canning techniques and delicious homemade preserves, explore our complete canning guide. To deepen your understanding of food acidity and safety, the USDA’s National Center for Home Food Preservation is an excellent resource.
Q&A
Q&A: Preserve the Flavor - Your Guide to an Authentic Salsa Recipe for Canning
Q1: Why should I make salsa at home rather of buying it from the store?
A1: Homemade salsa bursts with freshness and flavor that store-bought just can’t match. When you make it yourself, you control the ingredients-meaning no hidden preservatives or excess sugars. Plus, canning your salsa lets you capture the vibrant taste of summer all year round, preserving that garden-fresh goodness with every jar.
Q2: What makes a salsa recipe truly authentic?
A2: Authentic salsa hinges on simple, fresh ingredients-ripe tomatoes, crisp onions, fiery peppers, tangy lime juice, and fragrant cilantro. Rather than relying on shortcuts or pre-made sauces, an authentic recipe celebrates the natural harmony of these essentials with just the right kick of spice.The balance of acidity, heat, and herbaceous notes is key to that classic, soulful salsa flavor.
Q3: How do I ensure my salsa stays safe and flavorful when canning?
A3: Safety and flavor preservation go hand in hand. Start with tested, trusted recipes that use the right acidity levels (usually a splash of vinegar or lime juice) to prevent bacterial growth. Use sterilized jars and follow proper water-bath or pressure canning methods. This locks in flavor and keeps your salsa deliciously safe on your pantry shelf for months to come.
Q4: Can I customize the heat level in my canned salsa?
A4: Absolutely! One of the joys of homemade salsa is tailoring the heat to your taste buds. Wont it mild? Opt for jalapeños and remove their seeds. Craving fire? Add serrano or habanero peppers-just remember to adjust the quantity to avoid overwhelming your palate. Balance remains vital, so taste as you go and spice with confidence.
Q5: Are there any tips to maintain the vibrant color and texture of canned salsa?
A5: To keep your salsa visually appealing and fresh-tasting, choose firm, ripe tomatoes and dice your ingredients uniformly. Avoid overcooking the salsa before canning; a gentle simmer is enough to blend flavors without turning everything mushy. Adding ingredients like fresh onions and cilantro right before sealing helps retain their lively crunch and aroma.
Q6: How long can I store canned salsa, and how should I use it after opening?
A6: When properly canned and sealed, your salsa can last up to a year on the shelf, but for optimal flavor, enjoy it within 6-9 months. Once opened, refrigerate and consume within a week or two. Use your canned salsa as a dip, a topping for tacos, or a zesty ingredient in soups and stews-each jar packed with the essence of summer’s bounty.
Q7: What equipment do I need to get started with canning salsa?
A7: To start your canning adventure, you’ll need basic kitchen tools: a large pot for simmering, sterilized canning jars with lids and bands, a water bath canner or large stockpot with a rack, a funnel to fill jars neatly, tongs for handling hot jars, and a bubble remover or spatula to remove air pockets. With these in hand, you’re ready to preserve your salsa masterpiece.
Preserving your own salsa means savoring the authentic flavor of fresh ingredients throughout the year. With these tips and a bit of kitchen love, your next canning session can fill jars-and hearts-with homemade magic.Happy canning!
Wrapping Up
As the final jars seal with a satisfying pop, you’re not just preserving salsa-you’re bottling summer’s sun, vibrant flavors, and a touch of tradition to savor all year long. With this authentic recipe in hand, canning becomes more than a method; it’s a festivity of heritage and homemade goodness. So next time you crave that perfect balance of tangy, spicy, and fresh, reach for your carefully preserved salsa and taste the season preserved in every bite. Here’s to keeping flavor alive, one jar at a time!