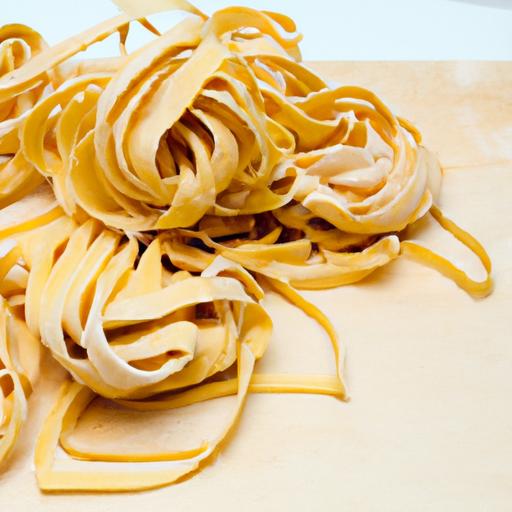
there’s something undeniably enchanting about the art of making pasta by hand-a ritual that transforms simple ingredients into a culinary masterpiece. Among Italy’s vast array of homemade noodles, tagliatelle stands out with its delicate ribbons and versatile charm. In this article, we’ll unravel the secrets behind mastering tagliatelle: from mixing the perfect dough to achieving the ideal thickness and shape, all culminating in a dish that’s as satisfying to create as it is to eat. Whether you’re a seasoned pasta enthusiast or a curious beginner, prepare to embark on a delicious journey that celebrates tradition, technique, and the irresistible joy of handmade pasta.
Mastering Tagliatelle is an invitation to immerse yourself in a timeless Italian tradition where simple ingredients transform into luxurious, handmade delight. Originating from the Emilia-Romagna region,this pasta embodies rustic elegance - its tender yet firm ribbons perfectly capture rich sauces,turning every bite into an authentic Italian experience. Let me take you through the essential steps, from selecting the ideal flour and ingredients to cooking and serving, so you can create flawless tagliatelle with confidence and flair.
Prep and Cook Time
- Readiness: 25 minutes
- Resting: 30 minutes
- Cooking: 3-4 minutes
- Total time: approximately 1 hour
Yield
Serves 4 generous portions
Difficulty Level
Medium – perfect for home cooks ready to elevate their pasta-making skills
Ingredients
- 2 cups (250g) “00” flour, sifted (ideal for silky texture and elasticity)
- 1 cup (120g) all-purpose flour, sifted (adds strength and structure)
- 3 large fresh eggs, at room temperature
- 1 tablespoon extra-virgin olive oil
- 1/2 teaspoon fine sea salt
Instructions
- Combine Flours: On a clean work surface, mound the “00” and all-purpose flours together, creating a well in the center like a miniature volcano.
- Add Eggs & Oil: Crack the eggs into the well. add olive oil and salt. Gently break the yolks with a fork and start incorporating flour from the edges slowly, ensuring no flour spills out.
- Kneading: Once the mixture starts coming together, knead vigorously with the heels of your hands for 10 minutes until the dough is smooth, elastic, and slightly tacky but not sticky. If too sticky, dust lightly with flour.
- Resting the Dough: Form the dough into a ball, wrap tightly in plastic wrap, and let it rest at room temperature for 30 minutes. This step relaxes gluten strands, making rolling easier.
- Rolling Out: Divide the dough into 4 discs. Using a rolling pin or a pasta machine, start rolling each piece from the center outwards, rotating regularly to maintain an even thickness. Aim for about 1-2 mm thickness or until almost translucent.
- Cutting the Tagliatelle: Lightly dust rolled sheets with flour. Fold loosely (do not compress) and slice into uniform strips approximately 6 mm wide. Unfurl and gently toss to prevent sticking.
- Cooking: Bring a large pot of salted water to a vigorous boil. Cook fresh tagliatelle for 3 to 4 minutes, or until al dente – tender with a slight bite.
- Serving: Drain carefully and promptly toss with your choice of sauce, saving a little pasta water to adjust consistency and silkiness.
Tips for Success
- Flour Choices: “00” flour is key for that classic tender texture; blending with all-purpose gives structure making rolling and cutting easier.
- Resting Matters: Do not skip resting - it’s crucial for dough extensibility and prevents shrinking when rolled.
- rolling Technique: Keep your surface lightly floured, but avoid over-flouring which can dry the dough.
- Cut Uniformly: Use a sharp knife or a clean pasta cutter for even strips – this ensures uniform cooking.
- Advance Tip: freeze unfurled tagliatelle on a floured baking sheet before bagging; this preserves shape and allows for make-ahead convenience.
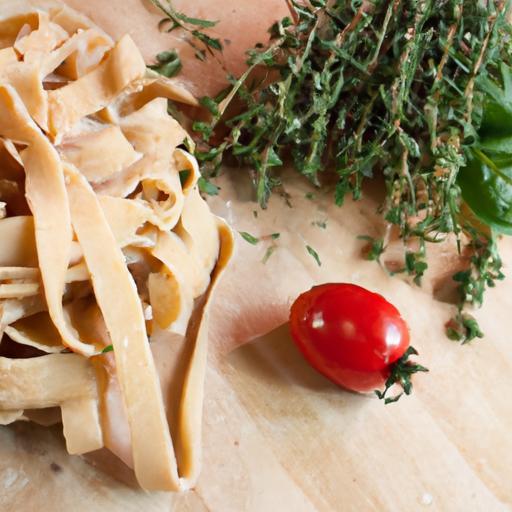
Serving Suggestions
For truly authentic enjoyment, dress your tagliatelle with a classic Italian sauce such as a beautifully simple mushroom ragù or a delicate fresh tomato and basil sauce. Finish with a drizzle of extra-virgin olive oil, freshly cracked black pepper, and a scatter of freshly shaved Parmesan or Pecorino romano cheese.Garnish with chopped fresh parsley or a sprig of basil for a vibrant contrast. Serving on warm plates enhances every silky ribbon’s charm.

Nutritional Information per Serving
| Calories | Protein | Carbs | Fat |
|---|---|---|---|
| 320 kcal | 11 g | 55 g | 5 g |
Discover more about pasta science and dough secrets from Serious Eats,a trusted culinary resource for home chefs striving for pasta perfection.
Q&A
Q&A: Mastering tagliatelle - A Delicious Handmade Pasta Recipe
Q1: What makes tagliatelle stand out among other pasta types?
A1: Tagliatelle’s charm lies in its simplicity and versatility. These long, ribbon-like noodles have a perfect balance of thickness and tenderness, making them ideal for clinging to meaty ragùs or delicate cream sauces. Unlike thinner pastas, tagliatelle provides a hearty bite that feels both rustic and refined.
Q2: Why should I try making tagliatelle by hand instead of buying it pre-made?
A2: Handmade tagliatelle transforms a meal into an experience. Crafting your own pasta lets you control texture and freshness, adding a personal touch that store-bought versions simply can’t match. Plus, the process connects you to culinary tradition, turning kitchen time into a joyful, creative ritual.
Q3: What are the basic ingredients for homemade tagliatelle?
A3: Pure simplicity rules here. You’ll need just flour and eggs-frequently enough 100 grams of all-purpose flour paired with one large egg per serving. Some chefs swear by a pinch of salt or a splash of olive oil, but classic tagliatelle sticks to the essentials to showcase pasta’s natural flavor and texture.
Q4: Any tips for kneading the dough perfectly?
A4: Think of kneading as waking the dough to life. Press firmly, fold, and turn repeatedly until the mixture becomes smooth, elastic, and slightly tacky but not sticky. This usually takes around 8-10 minutes. If the dough feels too dry, add a few drops of water; if too wet, dust with flour. Patience here pays off with silkier pasta.
Q5: what’s the trick to rolling out tagliatelle dough evenly?
A5: Roll from the center outward, turning the dough 90 degrees regularly to keep thickness uniform.Aim for a thin sheet-about 1-2 millimeters thick. If you don’t have a pasta machine, a sturdy rolling pin and steady hands will do the trick, although a pasta machine can make this step faster and more precise.
Q6: How do I cut the dough into perfect tagliatelle ribbons?
A6: Once your dough is rolled out, dust it lightly with flour, then loosely roll it into a log shape. use a sharp knife to slice crosswise into strips about 6-8 millimeters wide. Unroll each strip gently to reveal your beautiful ribbons. Alternatively, use a pasta cutter or a pizza wheel for quick, uniform edges.
Q7: How should I cook fresh tagliatelle for best results?
A7: Fresh pasta cooks swiftly-usually 2 to 3 minutes in boiling salted water. Keep a close eye to avoid overcooking; it should be tender but still have a slight bite, known as “al dente.” Drain well and toss immediately with your sauce of choice to let the flavors meld.
Q8: What sauces pair best with tagliatelle?
A8: Tagliatelle shines with robust, hearty sauces. Traditional Italian ragù alla Bolognese is a timeless classic. cream-based sauces with mushrooms or truffles also complement tagliatelle’s texture beautifully. For a lighter option,try fresh tomato and basil or a drizzle of sage-infused butter.Q9: Can I store fresh tagliatelle to use later?
A9: Yes! Fresh tagliatelle can be dried on a floured surface or hung over a drying rack for a couple of hours before storing in an airtight container.For longer storage, freeze the ribbons spread on parchment paper to prevent sticking. When ready, cook directly from frozen-just add an extra minute or two.
Q10: Any secret chef’s advice for elevating homemade tagliatelle?
A10: absolutely-don’t rush the process, savor it. engage all your senses: feel the dough’s texture,watch it transform,smell the flour and eggs melding.And when plating, finish with freshly grated Parmigiano-Reggiano, a crack of black pepper, and a drizzle of high-quality olive oil. These final touches transform your tagliatelle from pasta to poetry on a plate.
In Conclusion
Whether you’re a seasoned chef or a kitchen novice, mastering tagliatelle opens the door to a world of culinary creativity and timeless tradition. This handmade pasta, with its silky ribbons and tender bite, invites you to slow down, savor the process, and celebrate the art of Italian cooking. Armed with the techniques and tips shared here, your next plate of tagliatelle will be more than a meal-it will be a delicious expression of passion, patience, and pure, handcrafted joy. So roll up your sleeves, dust off the flour, and let each strand tell your own flavorful story. Buon appetito!