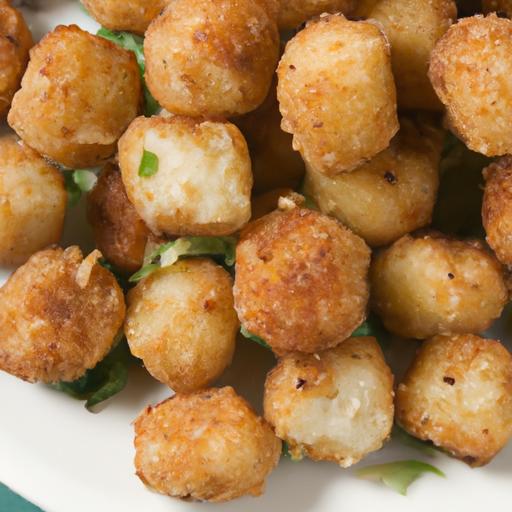
There’s something irresistibly nostalgic about tater tots-the golden, crispy nuggets that crunch delightfully with every bite, evoking memories of lunchroom trays and family dinners. But why settle for frozen when you can master the art of crispy homemade tater tots in your own kitchen? This easy recipe transforms humble potatoes into perfectly browned, melt-in-your-mouth bites of comfort. Whether your aiming to impress your guests or simply craving a satisfying snack, homemade tater tots offer a tasty twist on a beloved classic-and the secret to achieving that ideal crispiness might be simpler than you think. Let’s dive into the steps that will have you savoring hot, fresh tots straight from the oven or fryer, turning ordinary potatoes into extraordinary munchables.
Crispy homemade tater tots are a nostalgic comfort food staple that elevate simple potatoes into bite-sized golden treasures. Whether you’re craving a crunchy snack or the perfect side to a hearty meal, mastering the art of crafting these irresistible tots begins with selecting the ideal potato and ends with that perfect golden crunch achieved through smart cooking techniques.
Choosing the Right Potatoes for Ultimate Crispiness
For crispy homemade tater tots, the key lies in choosing potatoes with high starch content, such as Russet potatoes. These potatoes have a drier flesh that yields crispier textures when fried or baked.Avoid waxy potatoes like Red Yukon or fingerlings-they retain more moisture, causing soggy tots.
Once you’ve selected your Russets, peel and rinse them. Removing excess moisture is essential, so after grating or processing, wrap the potatoes in a clean kitchen towel and squeeze firmly to extract liquid.This step will guarantee that every tot crisps up beautifully instead of steaming during cooking.
Step by Step Guide to Preparing and Shaping Perfect Tater Tots
- Grate the Potatoes: Use a coarse grater or pulse in a food processor until you achieve fine, fluffy strands.
- Drain and Dry: Place the grated potatoes in a clean kitchen towel and press hard to remove all moisture.
- Mix the Binder: Combine the dried potatoes with 1 teaspoon salt, 1/4 teaspoon black pepper, 1/2 teaspoon smoked paprika, and 2 tablespoons all-purpose flour. The flour helps hold the tots together while keeping them light.
- Shape the Tots: Using your hands or a small scoop, form uniform bite-sized cylinders-compact but not too tight to avoid density.
- Chill: Arrange the shaped tots on a parchment-lined tray and refrigerate for at least 30 minutes. The chilling firms them up, improving their structural integrity during frying or baking.
secrets to Achieving Golden Crunch with Baking and Frying Techniques
Achieving the perfect crisp finish requires attention to heat and oil. For frying: Heat oil to 350°F (175°C) in a deep fryer or heavy pan. Fry the tots in batches, avoiding overcrowding, until they puff up and turn a rich golden color (about 3-4 minutes). Transfer to paper towels to drain excess oil.
Prefer baking? preheat your oven to 425°F (220°C). lightly brush or spray the tots with oil and place on a wire rack set over a baking sheet. Bake for 25-30 minutes, turning halfway, until crispy and golden. This method reduces fat but still delivers crunch perfection. For an extra pop of flavor, sprinkle sea salt and finely chopped fresh herbs like rosemary or thyme immediately after baking.
Tips for Serving and Storing Your Crispy Homemade Tater Tots
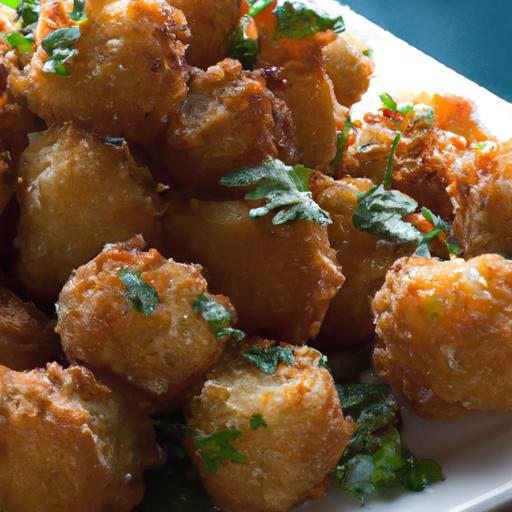
Serve these crispy bites hot with dipping sauces such as tangy ketchup, garlic aioli, or spicy sriracha mayo for a perfect pairing. Garnish with freshly chopped chives or a light dusting of parmesan for a chic presentation. They’re fantastic alongside burgers, breakfast plates, or even a fresh salad for crunch contrast.
To store leftovers, cool the tots completely before placing them in an airtight container in the refrigerator for up to 3 days. Reheat in a toaster oven or air fryer at 400°F (205°C) for 5-7 minutes to revive crispiness. Avoid microwaving as it leads to sogginess.
Prep and cook Time
- Preparation: 20 minutes
- Chilling: 30 minutes
- Cooking: 10-15 minutes (frying) or 25-30 minutes (baking)
- Total time: Approximately 1 hour
Yield
Makes approximately 4 servings (about 24 tots)
Difficulty Level
Easy to Medium
Ingredients
- 4 large Russet potatoes,peeled
- 1 teaspoon salt
- 1/4 teaspoon black pepper
- 1/2 teaspoon smoked paprika (optional)
- 2 tablespoons all-purpose flour,sifted
- Vegetable oil for frying or baking spray/oil for coating
Instructions
- Rinse and peel the Russet potatoes,then grate using a coarse grater or pulse in a food processor until shredded.
- Wrap grated potatoes in a clean kitchen towel, squeezing firmly to remove as much moisture as possible.
- Transfer dried potato shreds to a large bowl. Add salt, pepper, smoked paprika, and flour. Mix gently until combined.
- Shape the mixture into bite-sized cylinders using your hands or a small scoop. Place on a parchment-lined tray.
- Refrigerate the shaped tots for at least 30 minutes to firm up.
- For frying: Heat oil to 350°F (175°C).Fry tots in batches for 3-4 minutes or until golden. Drain on paper towels.
- For baking: Preheat oven to 425°F (220°C).Lightly oil tots, place on wire rack over sheet pan, bake for 25-30 minutes, turning halfway.
- Serve hot with your favorite dipping sauces and garnish as desired.
Chef’s Notes & Tips for Success
- For extra crispiness, soak grated potatoes in cold water for 10 minutes before drying. This removes extra starch.
- Don’t over-pack the tots-too dense and they won’t crisp properly.
- Test one tot before cooking the entire batch for seasoning and texture feedback.
- Substitute gluten-free flour or cornstarch for all-purpose flour to make tots gluten-free.
- Make a double batch and freeze uncooked tots on a lined baking sheet. Once frozen, transfer to bags for up to 1 month.
Serving Suggestions
Perfect alongside crispy baked chicken thighs for a hearty meal or served as an indulgent appetizer with a trio of dips: smoky chipotle ketchup, creamy ranch, and garlicky aioli. Garnish with freshly chopped parsley or grated Parmesan to enhance both flavor and visual appeal.
| Nutrient | Per Serving (6 tots) |
|---|---|
| Calories | 180 kcal |
| Protein | 3 g |
| Carbohydrates | 25 g |
| Fat | 7 g |
Learn more about potato varieties and their culinary uses to enhance your cooking repertoire.

Q&A
Q&A: Crispy Homemade Tater Tots – easy recipe for Perfect Bites
Q1: what makes homemade tater tots diffrent from store-bought ones?
A: Homemade tater tots offer that unbeatable blend of crispy golden exteriors and fluffy, tender interiors, crafted with your own hands. Unlike store-bought versions, which can be overly processed or bland, homemade tots let you control the seasoning, potato quality, and oil freshness for a truly personalized bite of nostalgia.
Q2: What type of potatoes work best for crispy tater tots?
A: Russet potatoes are the reigning champions for tater tots.Their high starch content helps achieve that crave-worthy crispiness while keeping the inside soft and pillowy. Avoid waxy varieties like red or Yukon Gold if your main goal is extra crunch.
Q3: How do I prepare the potatoes to get that perfect texture?
A: The secret is in the prep! Start by grating your peeled potatoes, then rinse them under cold water to wash away excess starch. After draining, squeeze out as much moisture as possible using a clean kitchen towel or cheesecloth. This step ensures the tots fry up crispy rather than soggy.
Q4: Can I make tater tots without deep-frying?
A: absolutely! While deep-frying delivers that classic golden crunch, baking or air frying are fantastic healthier alternatives. To bake, toss the tots in a light coating of oil, spread them out evenly on a baking sheet, and roast at 425°F (220°C) until golden and crisp-usually about 25-30 minutes, flipping halfway. Air frying takes about 15-20 minutes for a similar result, with less mess.
Q5: Should I add any special ingredients for extra flavor?
A: The beauty of homemade tater tots is their versatility! Simple salt and pepper do the trick, but you can jazz them up with garlic powder, smoked paprika, grated Parmesan, or chopped fresh herbs like rosemary or chives. Mix your seasonings directly into the potato mixture before shaping for an all-over flavor explosion.
Q6: How do I shape the tots for even cooking?
A: Traditionally, tater tots are small cylinders about one inch long.Use your hands to gently press and mold the grated potato mixture into tight little logs. If you want uniform size, a mini cookie scoop or even silicone molds work wonders. Just remember not to compress too tightly-it needs some air for tenderness inside.
Q7: Can I prepare the tots ahead of time?
A: You bet! After shaping, freeze the tots on a parchment-lined tray until solid, then transfer to a freezer bag. When ready, fry or bake straight from frozen-no thawing needed. This way, you have crispy homemade tater tots at your fingertips whenever snack attacks strike.
Crispy homemade tater tots aren’t just a side dish-they’re a delicious project that turns a few humble ingredients into the perfect bites of comfort. with a little patience and these tips,you’ll master the art of tots that crunch on the outside and melt in your mouth inside!
Insights and Conclusions
Whipping up a batch of crispy homemade tater tots is more than just a simple cooking task-it’s a journey back to childhood comfort with a fresh,homemade twist. Armed with just a few pantry staples and a sprinkle of patience, you can transform humble potatoes into golden, crunchy bites that steal the show at any table. Whether enjoyed as a snack, a side, or a party favorite, these tater tots prove that homemade truly tastes better. So next time the craving strikes,remember: perfection is just a peel,grate,and sizzle away. Happy cooking-and even happier munching!